Sunday, August 14, 2011

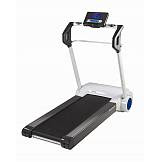
Reebok i-Run (Reebok Pure?) - Change KPH to MPH


The Reebok i-Run treadmill manual is poor and doesn't explain how to change the distance metric (from KPH to MPH or vice versa) and I know it's really annoying when you accidentally switch the modes during usage but can't work out how it was done (or if it was a software bug in the console).

There appears to be many versions of this treadmill (and I think it's now named the Reebok Pure), at least 2 i-Run and an i-Run plus so the following may not work but did for me:

Instructions to change distance metric:

  1. Plug in treadmill.
  2. Remove safety key.
  3. On the console hold down the Down Arrow button and Start button with one hand, and plug the safety key back in with the other,
  4. The display should show the current mode ("KM" or "ML"), press the Start button to choose your preferred mode.
  5. Press the Stop/Enter button to save and start the regular treadmill display, distances and speed will now be in your chosen metric.


Hope this helps, if it does just drop me a thank you below! :)

Tuesday, July 19, 2011

Sinclair Spectrum +3 to Amstrad CTM644 Monitor


I had a small amount of free time recently and rather than program I decided to hook up my old Speccy to an Amstrad CPC monitor to get an improved picture of scart quality. The old Amstrad CPC CTM 644 monitors are very cheap at car boot sales these days (if you can find them) but brilliant for retro gaming as Amigas and other computers can be connected to them. Here's a short how to on how I made a Spectrum +3 RGB cable (should also work for black +2A/2B) which connects to an Amstrad CTM644 monitor

I've never made a cable before and just needed a soldering iron and the parts below. You need the following components from Maplin:


Maplin CodeDetails
FJ91Y1x DIN Plug 8-Pin Circ
HH45Y1x DIN Line Scket 6-Pin
XS42V 1x 9 Way Cable (1 metre of screened scart cable)
M330R3x 330 Ohm Resistors (Optional! See below)


Total cost is £5.23 at today's prices.


The 8 pin DIN plug is the end for the Spectrum, the 6 pin socket connects to the CTM644's plug lead.

Only 5 wires are connected in the cable, red, green, blue, composite sync, and ground. The cable does not transfer sound as the CTM644 does not have any speakers. It has been mentioned on World Of Spectrum forums that the Spectrum's output to the monitor is too bright - I haven't had a problem and I assume below you won't be using/connecting the resistors, do this at your own risk, but should you need to they should go on the red green and blue pins. The resistors can be fitted any way around (but try and remain consistent). When using the monitor I found the brightness setting on the CTM644 needs to be at minimum.

The DIN socket has small "sewing needle" holed hooks to run stripped back wire into which can then be soldered to hold the wires in place. The DIN plug has tiny holes in the end of the pins for which stripped back wires can be inserted slightly, enough to hold for soldering.

The following image shows the pins from the back, i.e. the side you are soldering on. Apologies I'm not an electrician, my schematics are a bit naff :)


Things to watch for:

  • The 8 pin plug is "reversible", i.e. don't solder the pins on the wrong side otherwise the pins don't go into the spectrum all the way (yes I did this before I realised the pins had holes down the length on one side).
  • Be careful that solder doesn't join the pins.
  • The DIN plastic melts if you apply the iron too long to the pins so make sure you solder quickly.
  • There are metal pincer like pieces on the DINs' inner metal shielding (under the plug plastic cover). This is intended to clamp the cable (not the inner wires) after you have finished soldering so that the outer plastic cover, which fits the shielding grooves, holds the outer cable when you force it into the Spectrum/insert CTM plug.

Disclaimer:
I take no responsibility for mistakes in the above, if you break or hurt anything following these instructions, including exploding your monitor!
Saturday, June 18, 2011

Image to ZX Spec 1.3.0_01 Released

Update: Version 1.3.1 is now available.

Version 1.3.0_01 of Image To ZX Spec (more details) has now been released and is freely available.
Image to ZX Spec is written in Java and will work on Windows, Linux (tested on Ubuntu) or any Java 6 capable operating system.


Changes:

Version 1.3.0_01
- Added support for drag and drop on Ubuntu.
- Minor Ubuntu window size issue fixed.
- Fixed bad line numbering in Simple BASIC Loader.

Downloads:

Image to ZX Spec 1.3.0_01 Standalone (direct download, just unzip and double click jar file to start).
Try Image to ZX Spec 1.3.0_01 online.
Image to ZX Spec 1.3.0_01 Source code and Javadoc (note GPL 2.0 licenced).
Tutorial and demo videos

Thursday, March 17, 2011

OT: Worst (First) Bus Awards


Brightened my day to know I'm not the only one who suffers public transport.

Thursday, March 03, 2011

Image To ZX Spec 1.3.0 Released

Update: Version 1.3.1 is now available here.

Version 1.3.0(_01) of this application has now been released and is freely available.


Image To ZX Spec 1.3.0 is a multi core capable image and video converter that can produce vintage computer art images (jpeg/png) of any size and can even convert work to a real ZX Spectrum (or an emulator) as a slideshow or video. This is useful to create retro 8bit music videos, posters, tshirts, mock screenshots etc etc - you do not even need a Spectrum to use this program!


New for 1.3.0 - With the exception of the first Ubuntu (15 colour) screenshot above (the tool works on Windows and Ubuntu), the other screenshots illustrate the new GigaScreen 102 colour palette option. For more images and information on Image To ZX Spec's full capabilities read here. GigaScreen images are viewable on any Spectrum with a suitable GigaScreen viewer program. The large palette is a product of flashing two specially prepared images in sequence and due to persistence of vision extra colours can be seen. The real colours are displayed in Image To ZX Spec's preview and saved in other image file formats (png/jpeg) capable of being shown on a PC.


What reviewers have had to say:
"Great tool..."
(kgmcneil, World Of Spectrum)

Amazing stuff and works perfectly with SpecEmu.
(Pegaz, World Of Spectrum)

Awesome...
(orange, World Of Spectrum)

I like the option that you can see the result of different methods at the same time and can choose the one I like the best.

(Ralf, World Of Spectrum)

5/5 stars
(Editor, Softoxi)

5/5 stars
(Softpedia users' rating of Image To ZX Spec)


Third party artwork using Image To ZX Spec:
Changes in version 1.3.0
  • Added "GigaScreen" palette mode (102 colours).
  • Added "Reduced Set Colours" attribute favouritism.
  • Added drag and drop support.
  • Added proportional 256x192 preview capability to the dither preview dialog.
  • Removed lesser used tape loaders.
  • Fixed main window size bug.
  • Fixed missing dialog icon bug.
  • Improved Contrast slider sensitivity.
  • Improved preview repaint for Java >1.6.0_2x.
  • Updated readme and about dialog text.
  • Updated copyrights.

Image To ZX Spec antivirus scan report at softoxi.com

Downloads (updated for version 1.3.0_01):

Image to ZX Spec 1.3.0_01 Standalone (Softpedia mirror)
Image to ZX Spec 1.3.0_01 Standalone (direct download, just unzip and double click jar file to start).
Try Image to ZX Spec 1.3.0_01 online.
Image to ZX Spec 1.3.0_01 Source code and Javadoc (note GPL 2.0 licenced).
Tutorial and demo videos